I enrolled in Michael de Meng's Pez Dispensing Totem Online Workshop because de Meng has decided to recycle some of his old workshops online that he most likely will not be teaching in a live setting again. This gives a student like me, who discovered his art in 2007, a chance at the forms that were taught before I came on board his world.
The basic premise of this workshop is to retain the features of a Pez container but also radically alter it so that it looks like something very different. The key to the whole process is to utilize the already goofy nature of the creatures on the original Pez to make a entity more thematically dramatic than say Mickey Mouse, Bugs Bunny or a cute little reindeer.

The first Pez container I tackled was Mickey Mouse. This Pez's spring still lifted the guts but the head hinges no longer worked. I thought I would start with this one so that I could plunk a head on and not worry about it so that I could concentrate on my first totem building. So, off with Mickey Mouse's head! It was replaced with the skull of a muskrat skull that I had laying around the house (why, doesn't everyone?). The skull was attached with Aves Apoxie Clay and a rebar wire armature.

The exterior of the Pez container has to be worked on in order to prepare it for painting. For this Pez, I decided a full body treatment was in order.
While a Pez on its own can stand, with all the alterations that I am making to it, it is necessary to provide a base for the totem. This led to a search through my stuff for likely candidates for bases.

For this first totem, I sawed off one half of a binocular and decided to use its sloping shape for a base. In some packaging or other I saved a mesh net that was selected to give the totem some texture lines. After attaching the totem to the base, I added some metal wings, two baby arms, and a watch part for a halo.


Then it was time to paint, paint, paint.


The second Pez challenged me to sculpt a head. Sculpting is not something I have tried but I was inspired by the lesson in the on-line class. So I decided to select the reindeer because it would have a lot of stuff to hang Aves Apoxie clay onto plus the tin frame hung on the nose rather easily. That is Biakabutuka stopping by to sniff around.


Considering this is my first, I was rather pleased with the expression and rather surprised that he looks kind of happy. As I built this one, the base became a piece of cardboard.
Then it was time to paint, paint, paint.


This one is called Press to Reset.
For the third Pez, I thought I would try to wrap the base of the Pez in words rather than clay. I had a heart-shaped Pez to begin with so I went with the shape and the required single eyeball. For the base, I selected a rusty piece of metal that I decided I would not paint.

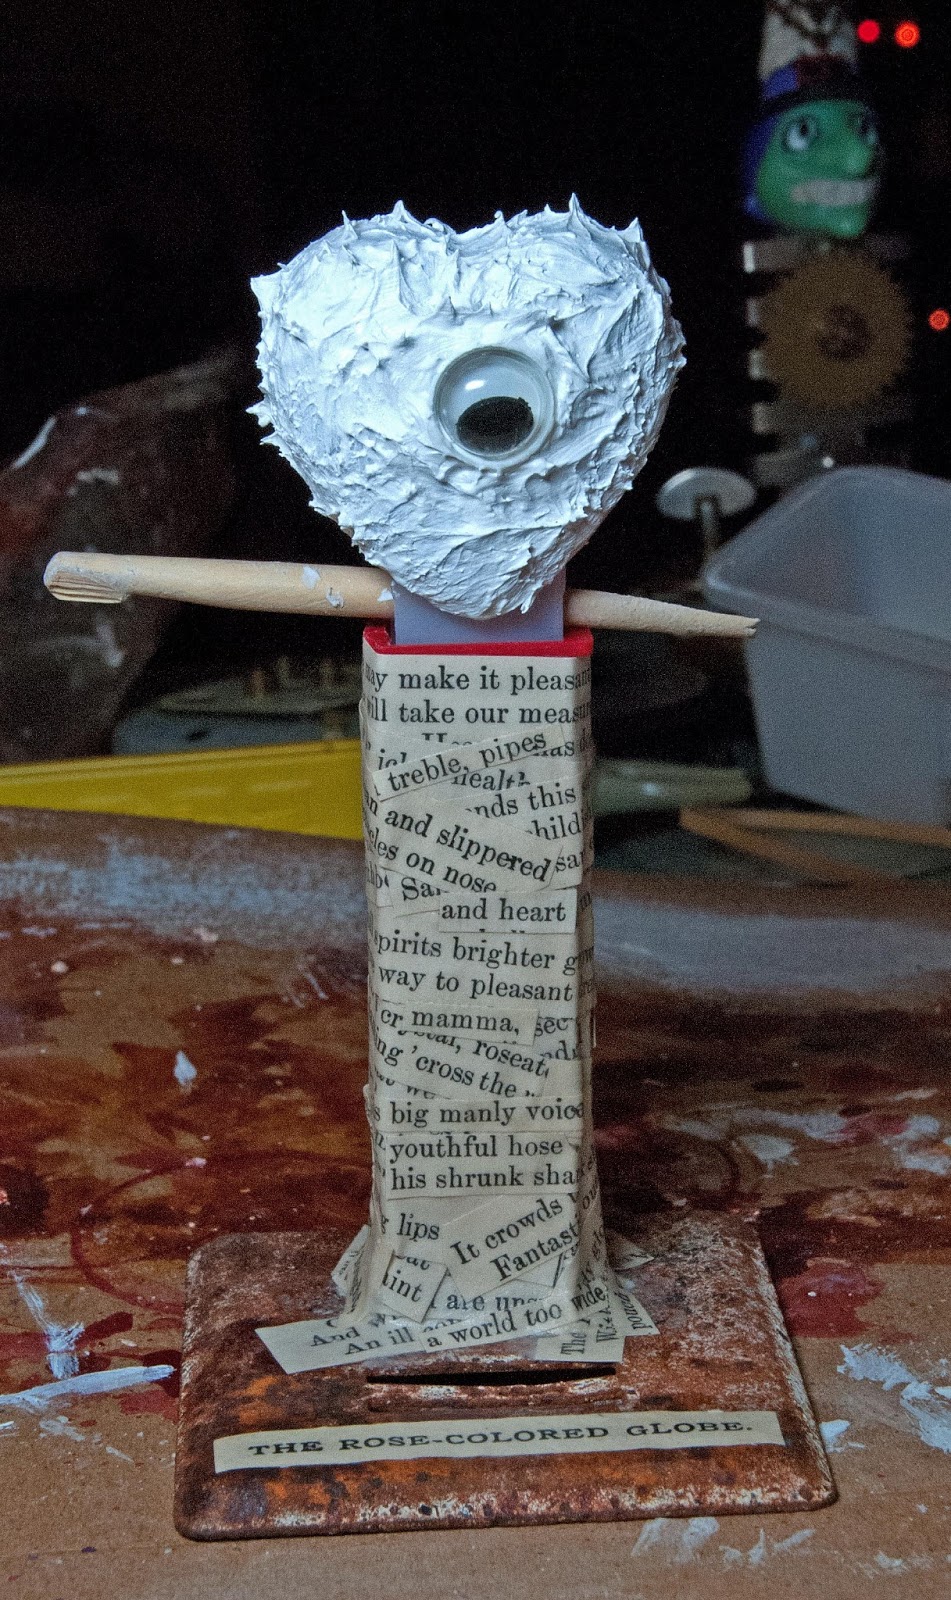
I decided I would paint this part of the structure up before doing anything else. Then to the back of the Pez I glued and apoxied a metal bar and some watch parts.


This one is called The Rose-Colored Globe.
The fourth Pez was a glow-in-the-dark witch.


Whether to keep that feature was solved when I got a little over-enthusiastic in the painting. The learning lesson on this piece was to glue or apoxie as much stuff to this one to practice that aspect of the Pez. Painting also became fun as I went with a metallic and darker look.


This one is called Witchy Woman.
The last Pez I worked on led to a decision to actually build a totem. I rummaged through my toy box to find the elements that would make a cool combination. I slid a little to the left when instead of an animal I choose a very unhappy looking young man from my doll box.


Claying up my totem was easier than I thought. This time around, I decided that I wanted to create a blend with my painting from light (swan) to dark (boy).


This one is called Headache Totem.
For more information about assemblage, Michael de Meng and his on-line workshops, please check out his information http://michaeldemeng.blogspot.com/
I really enjoyed looking at all of the pics you posted! You have a really cool blog! Your headache totum is awesome!!!
ReplyDelete